WebApps Development
Note
Before writing your first WebApp, please read about the regular Apps.
Warning
To write a WebApp, you must have Professional or Enterprise NodeActa Server license.
WebApps serve as entry points to your NodeActa system through a web browser. This is especially useful if you don’t have access to a PC with NodeActa Application Center installed, or if you are limited to using a smartphone or tablet. WebApps make your NodeActa system accessible on these devices. The trade-off is that NodeActa UI components are not available in this mode, so you will need to rely on standard web UI libraries instead.
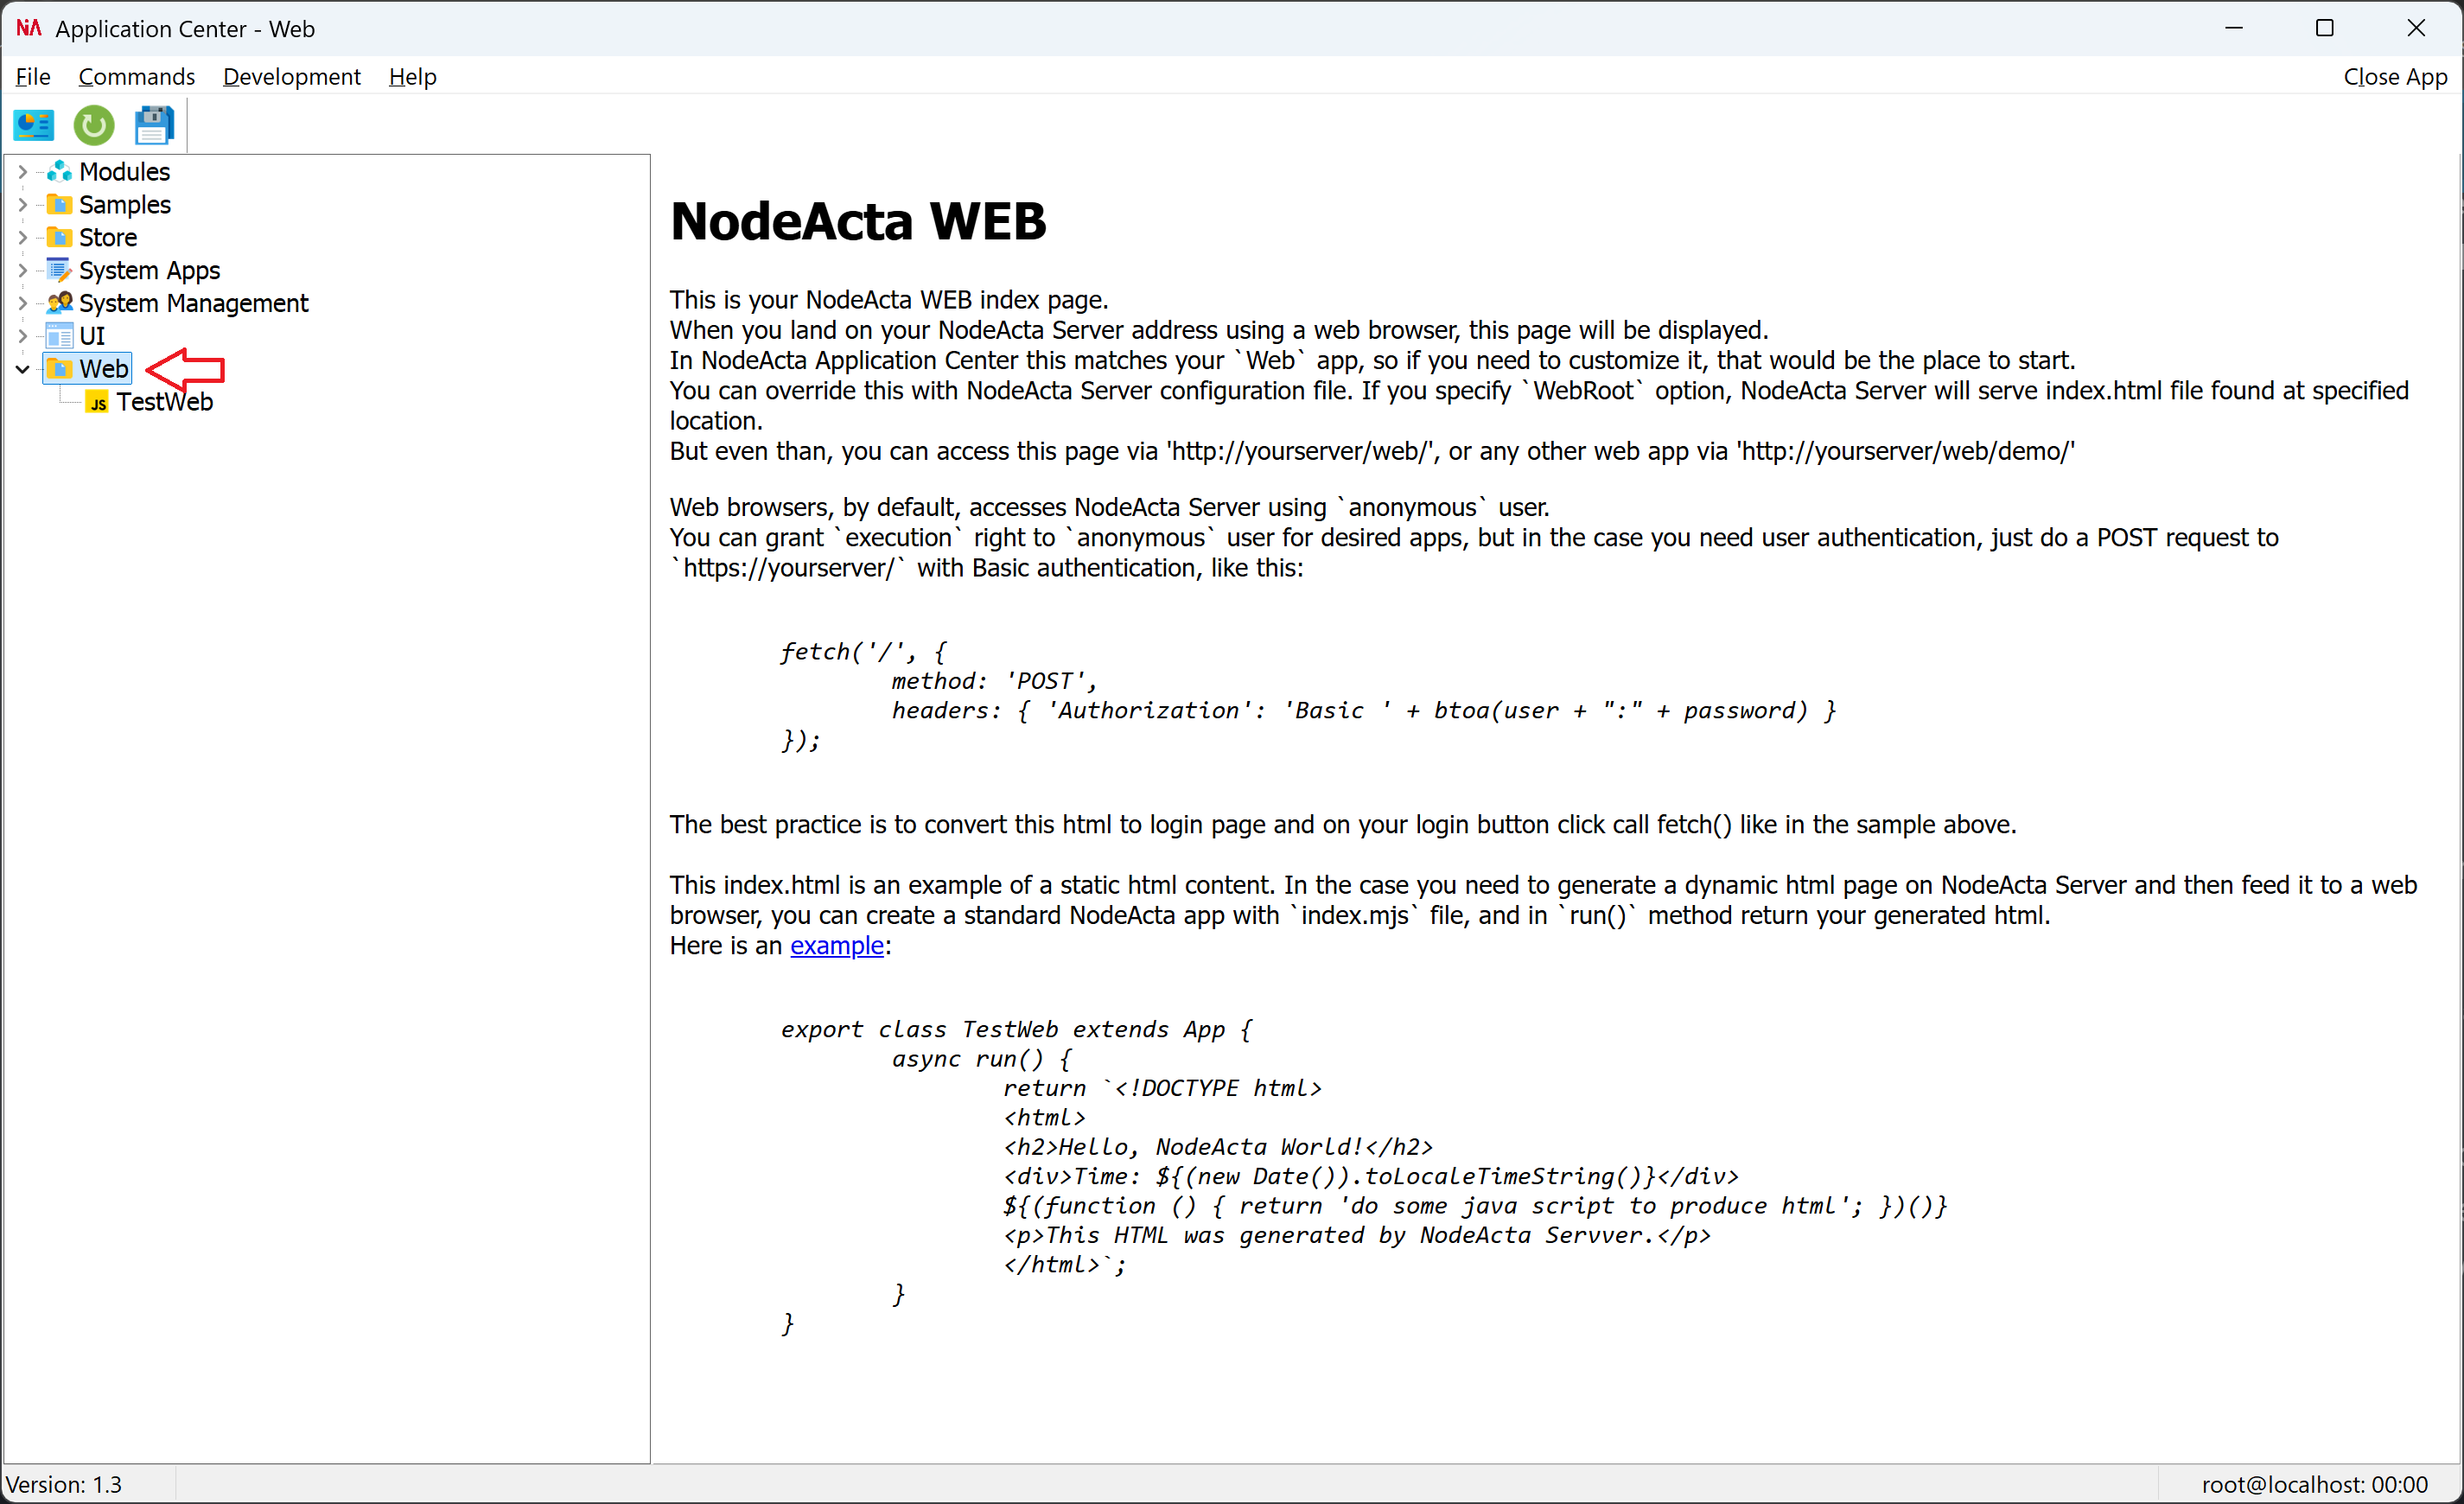
When you access your NodeActa system through a web browser, by specifying your server address or url, it will land on WEB app (marked on the picture below).
Any other app can be executed via https://my-nodeacta-server/web/my-web-app-1. Of course, you can group your web apps in containers, so something like this is also possible: https://my-nodeacta-server/web/my-container-1/my-web-app-2.
The best practice would be to use WEB app as your login page. If you don't implement login logic, your web app will be executed under anonymous user. To authenticate your web browser session, execute the following code when your login button is clicked:
fetch('/', {
    method: 'POST',
    headers: { 'Authorization': 'Basic ' + btoa(user + ":" + password) }
});
Note
When running your WebApp in Application Center, it uses the currently logged-in user. Any authentication on the WebApp’s own login page will be ignored.
The list of all available WebApps is displayed in your Application Center under WEB container.
Also, note that all WebApps can be run in Application Center too.
There are two types of WebApps:
- Static WebApps
- Dynamic WebApps
Static WebApps
A static WebApp consists of one or more HTML files along with supporting resources such as JavaScripts, images, and stylesheets. Unlike a regular app, where you create an index.mjs, the entry point for a static WebApp is index.html.
Within this index.html, you can reference any number of additional resources (other HTML files, JavaScript, CSS, images, etc.) from the same app, as well as from other WebApps or Modules.
For example, if your WebApp requires jQuery, you should download the desired jQuery version and upload it to NodeActa as a Module (see Module Manager). We strongly recommend including the version number in your module name (e.g., jquery.3.7.1) to help distinguish between versions in your WebApps. This is especially important when upgrading to a newer module version (remember, your web browser is caching your JavaScript files).
<!DOCTYPE html>
<html>
<head>
<title>NodeActa WEB</title>
<style>
body {
font-family: Tahoma, sans-serif;
font-size: 13px;
}
code {
font-style: italic;
}
</style>
</head>
<body>
<div class="main">
<h1>NodeActa WEB</h1>
<p>
This is your NodeActa WEB index page.<br/>
When you land on your NodeActa Server address using a web browser, this page will be displayed.<br/>
In NodeActa Application Center this matches your `Web` app, so if you need to customize it, that would be the place to start.<br/>
You can override this with NodeActa Server configuration file. If you specify `WebRoot` option, NodeActa Server will serve index.html file found at specified location. <br />
But even than, you can access this page via 'http://yourserver/web/', or any other web app via 'http://yourserver/web/demo/'
</p>
<p>
Web browsers, by default, accesses NodeActa Server using `anonymous` user.<br/>
You can grant `execution` right to `anonymous` user for desired apps, but in the case you need user authentication, just do a POST request to `https://yourserver/` with Basic authentication, like this:<br />
<pre><code>
fetch('/', {
method: 'POST',
headers: { 'Authorization': 'Basic ' + btoa(user + ":" + password) }
});
</code></pre>
The best practice is to convert this html to login page and on your login button click call fetch() like in the sample above.<br />
<br />
This index.html is an example of a static html content. In the case you need to generate a dynamic html page on NodeActa Server and then feed it to a web browser, you can create a standard NodeActa app with `index.mjs` file, and in `run()` method return your generated html.<br />
Here is an <a href="/web/TestWeb/">example</a>:
</p>
<pre><code>
export class TestWeb extends App {
async run() {
return `<!DOCTYPE html>
<html>
<h2>Hello, NodeActa World!</h2>
<div>Time: ${(new Date()).toLocaleTimeString()}</div>
${(function () { return 'do some java script to produce html'; })()}
<p>This HTML was generated by NodeActa Servver.</p>
</html>`;
}
}
</code></pre>
</div>
</body>
</html>
Dynamic WebApps
Warning
To run dynamic WebApps, you must install nodeacta.command.exe on your server PC.
A dynamic WebApp generates HTML or other resources based on the data stored in the system. Entry point for a dynamic WebApp is index.mjs, and app's run() method returns either a simple text or instance of HTTPResponse class. For simple text, the system automatically determines whether the output is HTML (starts with <!DOCTYPE html>), JSON, plain text or file path. If it returns a file path, the system will detect the MIME type from the file extension and respond with the appropriate content-type. In the case of HTTPResponse(headers, data), you will will specify desired content-type in headers argument, and actual resource content (must be JSON serializable) as data argument.
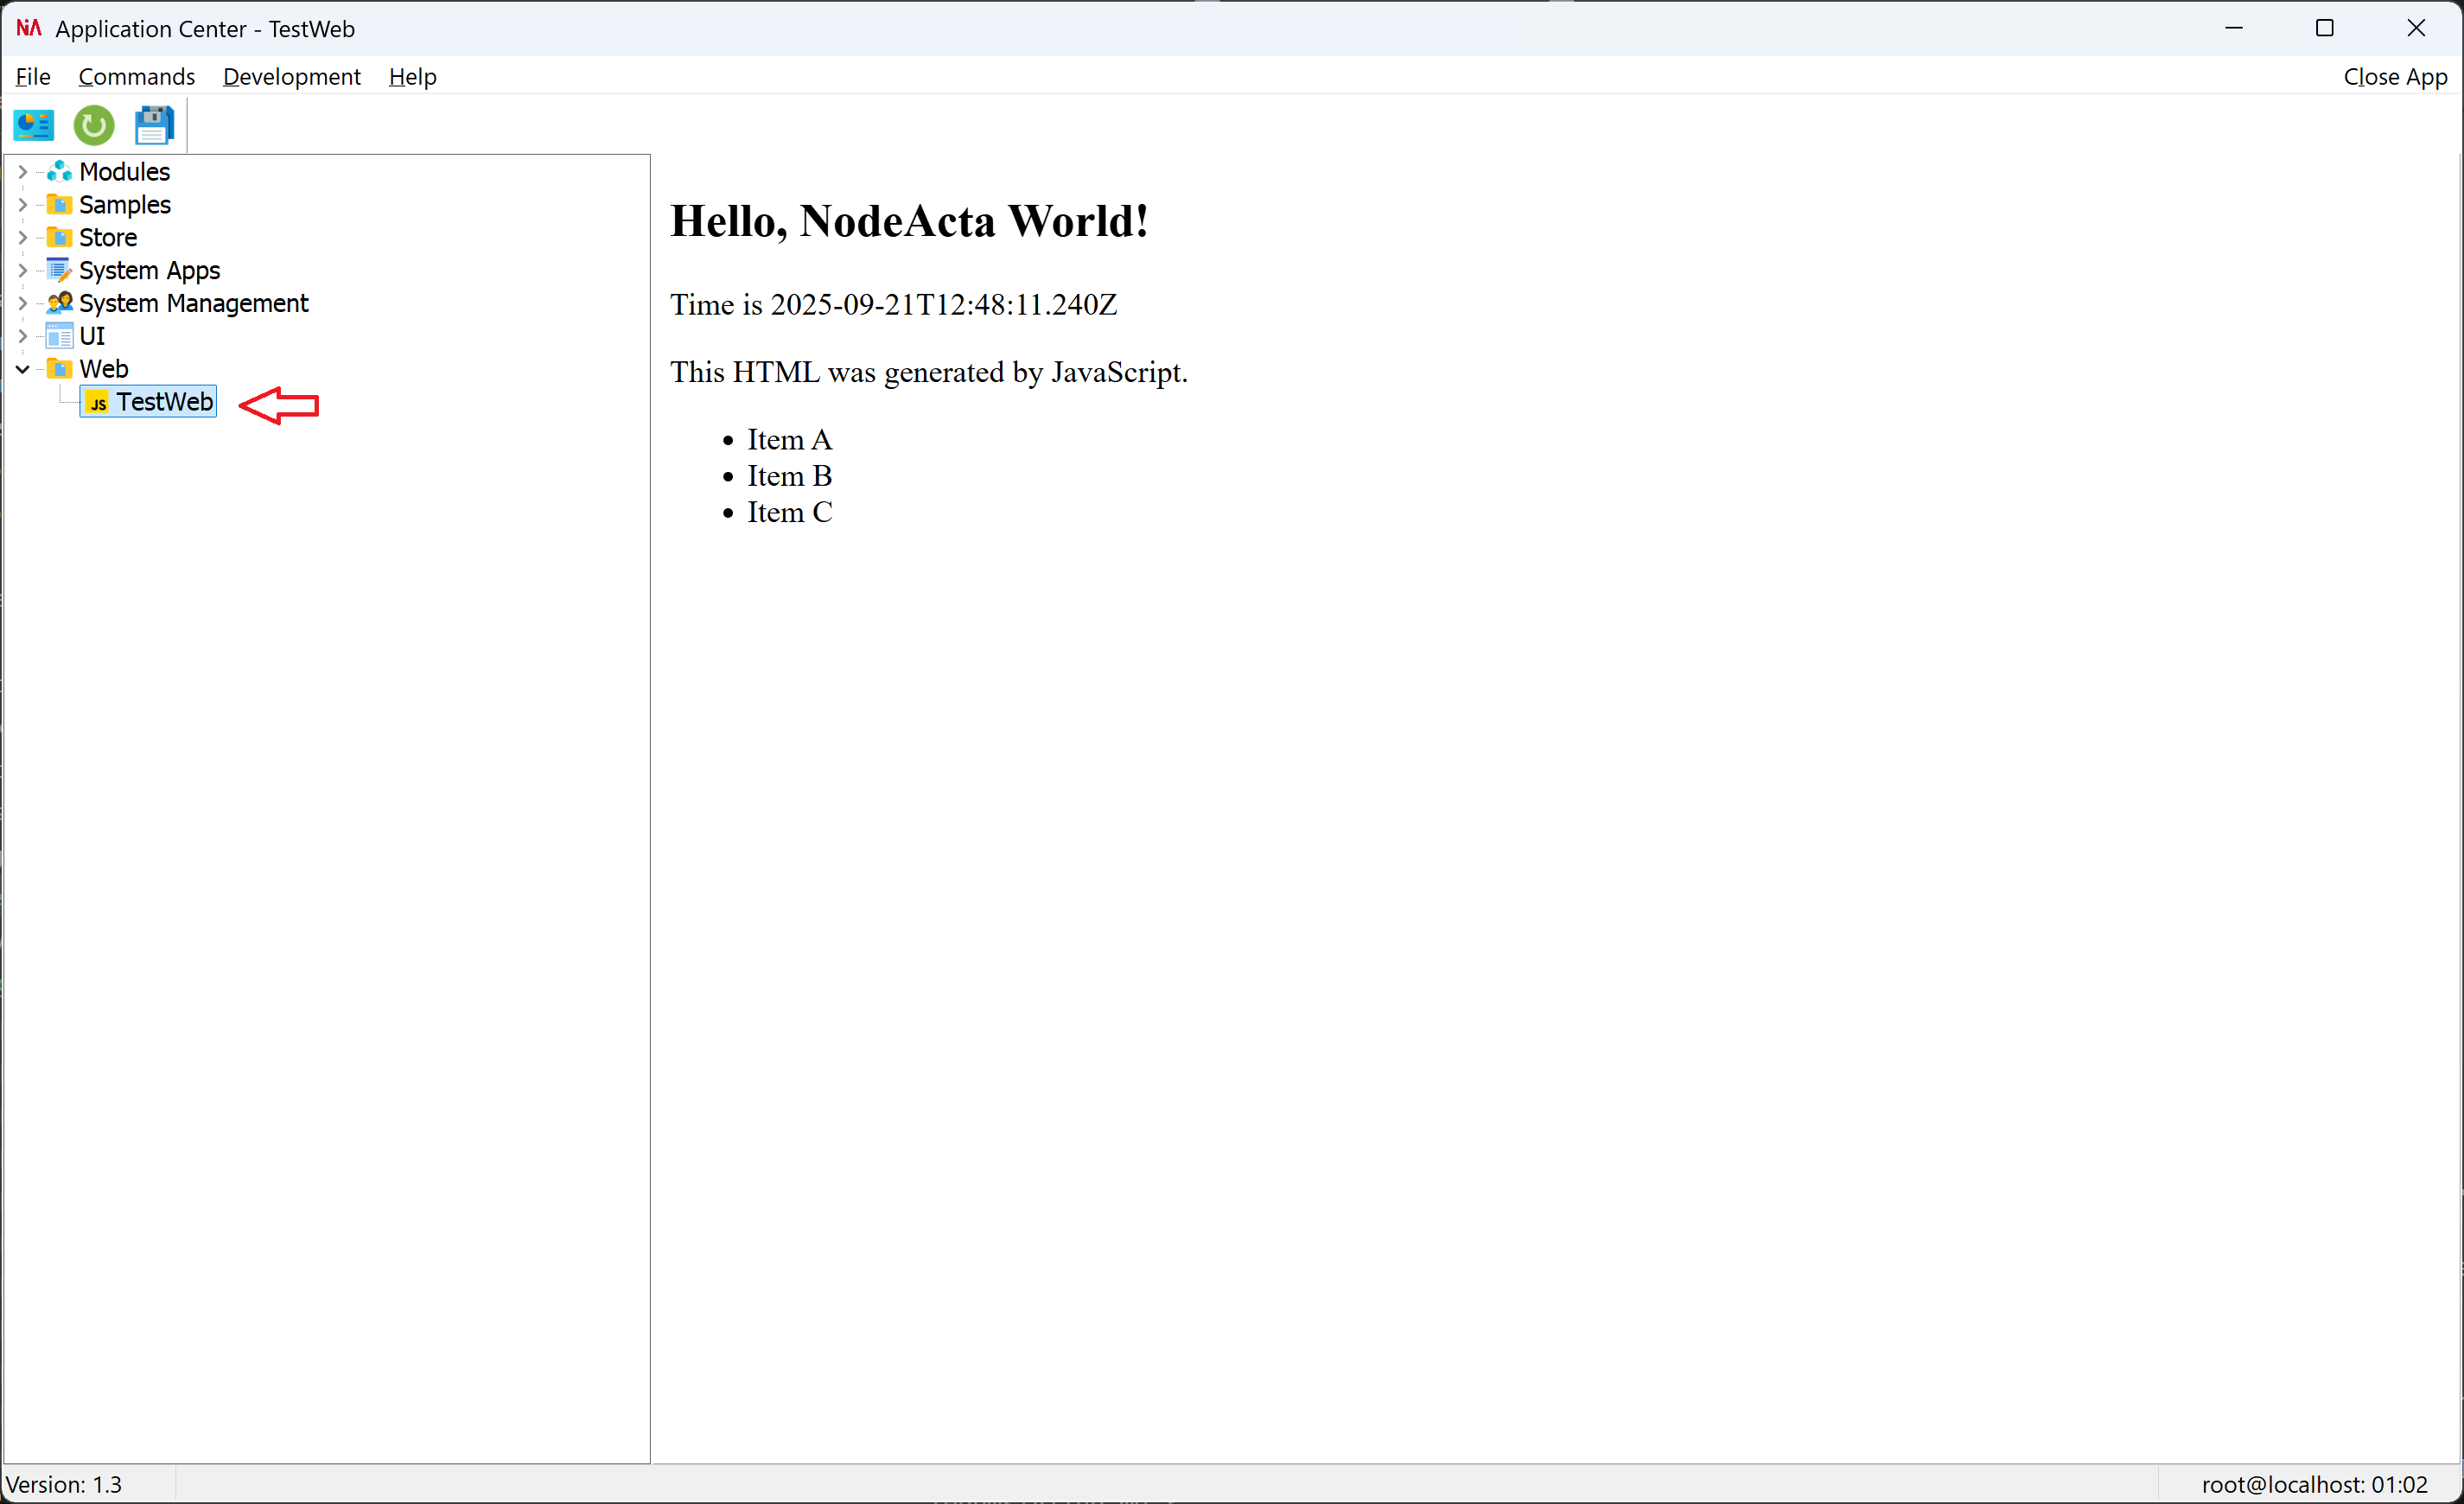
export class TestWeb extends App {
    myDate() {
        return (new Date()).toISOString();
    }

    *myItems() {
        for(let item of ['Item A', 'Item B', 'Item C'])
        yield `<li>${item}</li>`;
    }

    async run() {
        return `<!DOCTYPE html>
                 <html>
                    <h2>Hello, NodeActa World!</h2>
                    <div>Time is ${this.myDate()}</div>
                    <p>This HTML was generated by JavaScript.</p>
                    <ul>
                    ${[...this.myItems()].join('')}
                    </ul>
                 </html>`;
    }
}
The equivalent code for TestWeb app using HTTPResponse class would be:
export class TestWeb extends App {
    ...

    async run() {
        return HTTPResponse(
            { 'Content-Type': 'text/html; charset=utf-8' },
            `<!DOCTYPE html>
             <html>
                <h2>Hello, NodeActa World!</h2>
                <div>Time is ${this.myDate()}</div>
                <p>This HTML was generated by JavaScript.</p>
                <ul>
                ${[...this.myItems()].join('')}
                </ul>
             </html>` );
    }
}
If you are using a file path as resource, it must be a full path. You can also use a local file from your WebApp, but you will have to access it as:
run() {
    return this.path + 'myLocalFile.png';
    // Hint: remember 'this.path' is App.path proeprty returning app's root dir path.
}
App Parameters
Dynamic WebApp can also have parameters. You can use simple url parameters like https://my-nodeacta-server/web/my-web-app?param1=value1¶m2=value2. In JavaScript code you can assess these values via App.args or env.args property. For example:
export class TestWeb extends App {
    if (this.args.param1 == 'some value' )
        return this.path + 'myLocalFile1.png';

    if (this.args.param2 == 'some other value' )
        return this.path + 'myLocalFile2.png';

    return '<some HTML>';
}
In the case you want to run your NodeActa app with JSON parameters, you can do the following:
$.ajax( {
    type: 'POST',  // or PUT if you dont want to wait for result
    url: "/web/my-web-app",
    contentType: 'application/json',
    dataType: 'json',
    data: JSON.stringify( {
        param1: 'val1',
        anotherParam: 33
    } ),
    success: function(result) {
        // result is WebApp's run() method return value
    }
} );
In this case, you will access JSON params via args.data property, like: